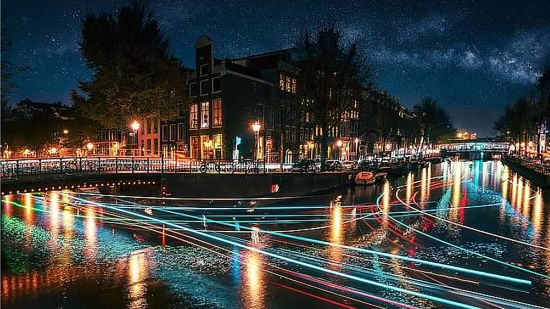
This holiday season will likely be a bit different for many of us, but it will still give us plenty of opportunities for family photo shoots, photographs of Christmas lights and many more reasons to put our cameras to use creating special memories of magical holiday moments. You might even be on the giving or receiving end of Christmas gifts of cameras and other photography equipment.
The best way to learn how to use that equipment is to practice. (Yes, just like my other favorite topic, figure skating!) Whether you head outside seeking street photography, landscape photography or the best Christmas light display in your area, or the peak of the Geminids meteor shower, these tips will help you understand your camera and get the results you are seeking.
What You Need for Photography
Like many, at the start of my photography journey, I thought I NEEDED all kinds of equipment and some of it was a bit overwhelming. I soon learned that what I really needed to embark upon this journey of adventure, capturing memories, and meeting people around the world was rather basic.
The main items you need to get out in the field and start taking photographs are:
- A camera (Mine is a Sony a7R III Mirrorless Camera.)
- A lens
- Film or memory card for your camera
- Charged Batteries (Don’t forget to charge the camera batteries ahead of time, and an extra is always nice to have.)
- A sense of adventure
In reality...that's it! With just these tools you are ready to get outside and start shooting everything that catches your eye and practicing the various compositions and more that we have already discussed.
I have linked some of my preferred equipment here, and some of my favorite extras – especially for outdoor photo shoots – follow, but you can start with just the basics.
- A camera backpack (I swear by my Lowepro Freeline Camera Backpack.)
- A flexible compact tripod (I travel with the Joby JB01507 GorillaPod 3K Kit and am even using it for teaching classes via Zoom.)
- Pelican cases (You can never have enough! The Pelican Go G40 Case - Waterproof Case is great for memory cards.)
DSLR Camera Basics - The Exposure Triangle
Source: Wikimedia
The Exposure Triangle is one of the most important things to know as you embark on your journey. Why? Well this is because it explains everything you need to know about how your camera captures those special festive season moments.
Your ISO, Aperture and Shutter combined are known as the “exposure triangle”. If you know how to control or adjust these elements, taking well exposed photos will not be a problem for you. It will also help you capture the image you see in your mind’s eye rather than the full automatic mode image your camera defined. Understanding each element can help you achieve your dream shot.
ISO
The ISO refers to ratings that define the sensitivity level of your camera to light. ISO value is determined by numbers: the lower the number, the lower the sensitivity to light. Higher values mean it is more sensitive to light. Depending on your camera, the lowest value is 50, 100 or 200.
It's important to understand the effect of ISO settings. For example, if you want more saturation, less noise and more details, go for ISO 100. If you want less saturation and detail, go for a higher number, like an ISO of 400. Each time you increase the ISO level, the sensor’s sensitivity is doubled (ISO 100 to ISO 200, ISO 200 to ISO 400, and so on). This means that you need half the amount of light hitting your sensor for the same exposure. Thus, exposure is increased by a factor of 2.
Here are two examples of using ISO at different levels:
I chose these two photos I took at Joshua Tree because they are perfect examples of how ISO impacts the other two settings in the Exposure Triangle, but also increases grain in the image due to light sensitivity.
Aperture
Aperture is all about controlling the amount of light that gets to the digital sensor of your camera. The aperture is the opening found in your camera lens. As such, controlling the aperture or choosing to use the Aperture Priority mode allows you to adjust the amount of light that can get into your camera so that it can either open (widen) or close (narrow). The aperture setting is determined by several f-stop values. The usual numerical values for the f-stop are 1.4, 1.8, 2.0., 2.8, 3.6, 4, 5.6, 8, 11, 16 and 22.
When you adjust the aperture, note that as the numerical value increases, the aperture becomes smaller and the amount of light that gets through decreases. Also, the smaller the aperture size, the wider your depth of field — a deeper portion of your photo will be in focus. For shallow depth of field photos, use a larger aperture size (i.e. a smaller numerical f-stop value).
If you need to remember one thing, it is this: when you adjust the aperture by just one stop, you either halve or double the amount of light that goes through your camera lens. Keep practicing until you familiarize yourself with the different f-stop values, and until you produce the images you want.
Here's an example (also from Joshua Tree):
This low Aperture means a smaller depth of field and, thus, blurred foreground + background from the main focal point.
Shutter
Every time you press the shutter button, a door that opens and closes activates in front of your camera’s sensor. This is the shutter mechanism that determines the length of time the sensor is exposed to light. In other words, while aperture controls how much light reaches your sensor, and shutter speed controls how long light reaches your sensor.
The shutter speed is measured in fractions of a second. So, if you use 1/100s, this means that your camera sensor is exposed to light for only one hundredth of a second. If you need to remember one thing about shutter speed, it is that when the shutter speed number is a smaller fraction, the faster the shutter opens and closes.
Here are two examples of shutter speed adjustments:
The Joshua Tree photo was shot at the right moment. 'Nuff said.
The Jersey Shore photo was actually shot on manual mode on my Samsung S9+ I was experimenting with shutter on the phone camera at the time, and I loved the way this image came out.
These examples both show movement, but in a very different way, which is why I wanted to share these images in the context of shutter speed.
Take a quick review of my blog on Composition & Consideration and Photography in Your Backyard.
Now for the easy part!
Go out and have your own photo shoot. The more you put your camera on Manual mode, the more you will be forced to experiment with the exposure triangle and bring your images to life.
For this holiday season, I encourage you to take lots of family photographs, winter landscape photography, and to seek out special holiday events even though advance reservations and extra social distancing may be required. Some local options for festive holiday light displays include those listed below. Sadly, many others are cancelled due to the pandemic, but I bet you will find some great displays driving around your neighborhood.
Christmas Light Show & Village at Skylands Stadium, Augusta, NJ (November 20, 2020 – January 3, 2021)
A mile long drive through route, walk-through light displays, Santa’s Workshop, Skating Rink (yes, I always pick the places with skating rinks!), eight-foot Polar Bear Statue, Yuengling’s Ice Cream Shop, and Hot Chocolate Bar, S’more Station, Carnival Games, and lots of Christmas shopping with local artisans.
PNC Bank Garden State Arts Center Drive Through Light Display
This event is fully drive through, so photos may be challenging. Sit by an open window and just do your best!
And, if the weather cooperates, be sure to check out the Geminid meteor shower from approximately December 10 -14, peaking on the night of December 13 – 14. The new moon on December 14 insures dark nights that are the best for viewing meteors. This natural display may be the best of this crazy festive season!
Wishing you peaceful holiday season. Please stay safe & well!
As an Amazon Associate, I earn from qualifying purchases.