Looking for a cute, handmade addition to your tree or holiday decor? Look no further than this sweet felt peppermint ornament! Follow along with this tutorial courtesy of the new ADHDIY™ Craft Cafe at Zona Rosa. If you don't have the supplies at home and don't want to go grab them, you can stop by their studio to make this craft there this winter.
You’ll need:
- Felting wool (white)
- Felting pad
- Felting needle
- Sewing needle
- Needle threader
- Red or green embroidery thread
- White embroidery thread
- Scissors
Directions:
1. Create the Core of the Mint
Take the white wool and roll it gently between your palms, compressing it into a thick, flat circle—roughly the shape of a peppermint. Place the circle on the felting pad.
2. Start Felting
Using the felting needle (the larger one with a barbed tip), begin tangling and condensing the wool fibers by repeatedly stabbing them with the needle. Sculpt the wool into a peppermint shape as you go. Periodically lift and flip the piece to prevent it from sticking to the pad.
To flatten, stab straight up and down from the center outward. To round and define the edges, angle the needle slightly as you stab, pushing the wool toward the center.
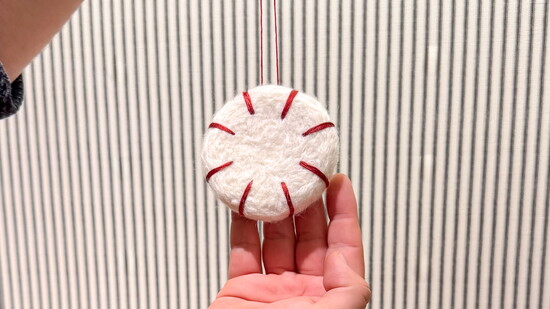
3. Add Stripes
Cut a piece of red or green embroidery thread and thread the smaller sewing needle, pulling 1–2 inches through the eye. Tie a double knot on the long end to prevent slipping through the wool.
Starting about ½ inch from the outer edge, push the needle through the back of the mint and pull until the knot catches. Wrap the thread around the outside of the mint to form a stripe, then push back through the same hole. Repeat two or three times to thicken the stripe.
Secure with a small knot in the back and trim excess thread. Repeat for five more stripes, cutting new thread as needed.
4. Add the Hanging Loop
Cut a piece of white thread and thread the needle. Push it through one of the white sections of the mint, from back to front. Remove the needle and tie the loose ends together to form a loop of your desired length. Rotate the loop until the knot is hidden in the back.
Find this craft and more — like kokedama suspended plants, a personalized stamp, or a macrame keychain — at ADHDIY™ in Zona Rosa.
ADHDIY™ Craft Cafe
1501 W 12th St, Kansas City, MO 64101