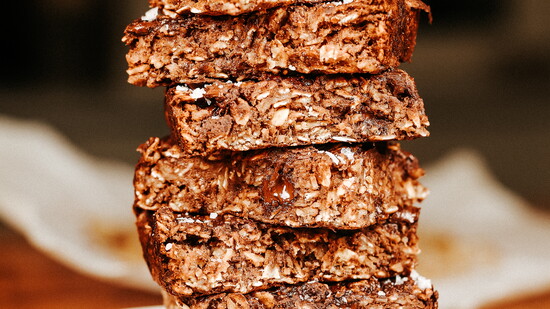
Granola bars are a staple in my house, and I’ve spent a fortune on name-brand bars. They’re not even good and I still buy them. Why is it so hard to find something with minimal ingredients that doesn’t taste like straight-up seeds and nuts?
Eventually I accepted that the perfect granola bar probably wasn’t waiting for me on a shelf. If I wanted something delicious, filling, and made from ingredients I already had at home, I was going to have to make them myself.
The good news is these come together in minutes and solve another problem at the same time: those bananas that are a day away from rotting on your counter. Sure, you could make banana bread again, but there are only so many loaves a family can eat before they lose their minds.
These bars are simple, portable, and just sweet enough to feel like a treat while remaining the perfect breakfast food. Make a batch on Sunday and you’ve got breakfasts, lunchbox fillers, and emergency “I forgot to eat” snacks for the week. These oat bars will surely become a family favorite; now you can’t say I’ve never done anything nice for ya.
Ingredients
3 to 4 ripe, borderline rotten bananas
2 cups rolled oats
1/3 cup peanut butter
1/4 cup honey
1 (generous) teaspoon vanilla extract
2 tablespoons chia seeds
1/4 cup almond flour (optional, not sure if it adds much but I had some lying around)
2 tablespoons cocoa powder
1/2 teaspoon cinnamon
1/2 teaspoon salt
1/2 cup dark chocolate chips or a chopped chocolate bar (I tend to go heavy here; follow your heart)
1/2 cup mixed nuts (pecans, walnuts, etc.), optional but highly recommended
Directions
Preheat oven to 350 degrees. Line an 8-by-8-inch pan with parchment paper to prevent it from sticking to the pan. (I think my pan is a 7-by-9-inch rectangle or something weird like that; follow your heart and do what feels right.)
In a large bowl, mash bananas until mostly smooth. Stir in peanut butter, honey, and vanilla. Add oats, chia seeds, almond flour, cocoa powder, cinnamon, and salt. Mix until mixed.
Fold in chocolate and nuts, if using.
Transfer to pan and press down firmly.
Bake 20 to 25 minutes until set and allow to cool completely before slicing. These hold up great for three to five days on the counter, even longer in the fridge, and you can freeze them, too.
@barefoodtim
Dripping Springs’ Tim Laielli (@barefoodtim) is a self-taught social media chef, wedding photographer, and master of dad humor. Known for deadpan delivery and painfully good puns, he turns everyday family chaos—picky kids, messy kitchens, and 90s nostalgia—into relatable comedy. He happily mocks influencer perfection while cooking through it all.