Extended side angle is a pose you find frequently in the 'Sun B' portion of a vinyasa yoga class, and it usually comes after a warrior 2. For this tutorial, I'll assume you are already in warrior 2 and walk you through extended side angle from there.
Warrior 2
- Front toes point to the top of your mat
- Back toes point to the side of your mat
- Hips and shoulders face the side of your mat
- Arms reach out to the sides
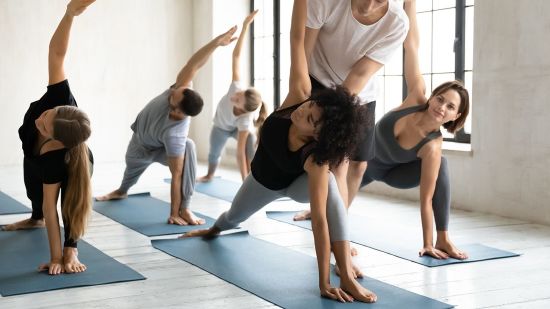
Extended Side Angle
These cues are for an extended side angle with your right foot in front. To do the left side, just reverse the cues.
- Keep your legs exactly as they already are in warrior 2.
- Reach to the right side with your hand as far as you can, then tic-tock your arms to tilt to the right side.
- You can rest your right elbow on the inside of your right knee for support.
- Reach your left arm up over your head toward the top of your mat.
- Pull your left shoulder back to open your chest.
- Pull your left hip back to square your hips back to the side if they have shifted at all.
- Energetically press through the knife edge of your left foot to redistribute your weight.
- Engage your right oblique muscles to slightly lift your torso away from your right leg.
The goal here is not to touch the ground with your right hand. It is to find length through your side body and to keep your spine straight. This is why you can use your knee as support, to prevent crunching your side. However, be mindful not to dump all of your weight onto your right thigh. Continue to use your core to hold your upper body.
Up-level: If you would like more of a challenge to work your abs and oblique muscles, try extending your right arm out to the side so that both hands are reaching out to the top of your mat past your head. You can imagine you are holding a big beach ball over your head. Remember to keep your top hip and top shoulder stacked over your bottom hip and shoulder—and please keep breathing!
Breath: From warrior 2, take an inhale. Exhale as you reach into extended side angle.
Follow Hayley Hyer @hayhyer